8.1 C
New York
Sunday, November 10, 2024
Home Blog

Firefox Addons Not Working| Here is Why

0

Sometimes, when a user launches Firefox, the browser starts but with no addons or addons that do not operate. So we have laid down all the information to provide the possible solution from essential to core problems for why Firefox Addons Not Working.

The Mozilla Firefox is a free and open-source web browser created by the Mozilla Corporation. Firefox is accessible on all major operating systems, including Windows, macOS, Linux, and all mobile devices. It is the fourth-most popular web browser after Google Chrome, with a 7.79 percent use share as a “desktop” web browser. Firefox was well-liked by its testers and praised for its speed, security, and addons compared to competing browsers.

firefox addons not working

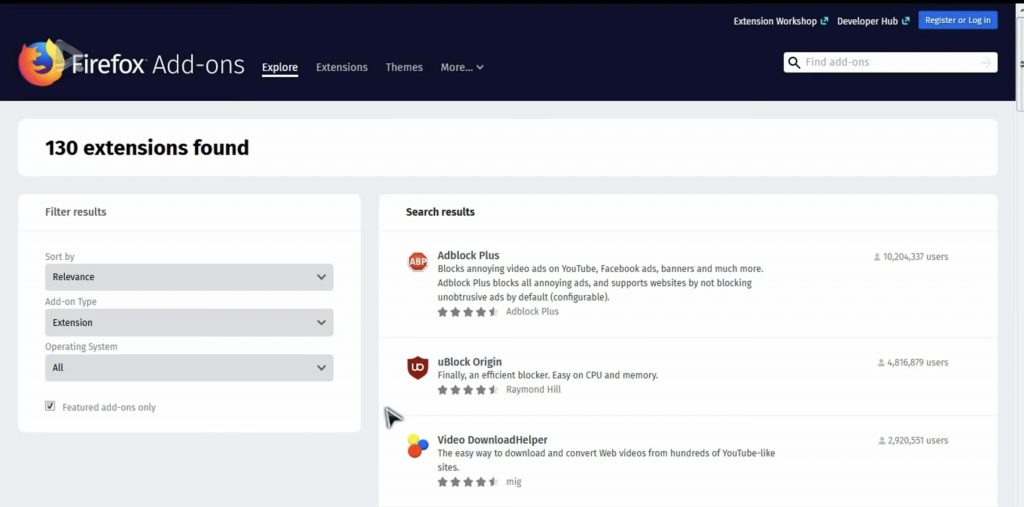
Mozilla Firefox addons are scripts that users can install on Firefox to alter the browser’s functionality. Also, it entails introducing new features to Firefox or changing current behavior to solve problems, expand functionality, or improve its security.

Firefox Addons Not Working – Quick Fixes

Firefox is an excellent browser, thanks to its flexibility in terms of how much modification a user can apply. Addons are in charge of changing how Firefox works, enhancing its functionality, and personalizing its look.  However, many users claimed that no addons were working on the Firefox browser or that all extensions had been disabled. Re-enabling them can be painstaking. However, you can follow the below-listed steps to fix the issues quickly.

Solution 1 – Quick Refresh

A quick refresh might assist if someone is facing issues with Firefox. Refreshing Firefox may resolve fundamental difficulties by returning Firefox to its default state without losing essential information such as bookmarks and passwords. So if the Firefox addons not working, try the dedicated Refresh Button from Firefox located at the top of the Firefox about: support Troubleshooting Information page.

A Refresh confirmation popup may display, verifying the user’s action to exit and refresh Firefox. Following the completion of a refresh, a window will appear with a list of your imported data. Click the Finish button, and Firefox is now ready to use again. It is the most recommended step as it is simple and fixes most of the issues. If the problem with the addons persists, try the alternatives listed below.
firefox addons not working

Solution 2 – Updating the Browser

Try to keep on updating to the newest version of any program to get the best possible experience. Therefore we advise users to compare their current version to the version Mozilla has recently pushed out.. Mozilla has an automatic update option for users to check whether the version they are using is up to date or not. Head to the help section by clicking the menu button in the upper right corner. When you click the “About Firefox” label, a new window appears. The browser automatically looks for an update to download.

Solution 3 – Re-enable the Firefox add-ons

Some Firefox bugs might cause the addons problems. Deactivating and reactivating the  Firefox addons as the tendency to resolve such issues. During this operation, all addon modules are re-initialized and restarted. Users may access the menu by clicking on the menu in the top right of the window. In the displayed menu, choose Addons and disable each addon by toggling its corresponding switch to the off position. Finally, enable the toggle switch again, and hopefully, this solves the problem.

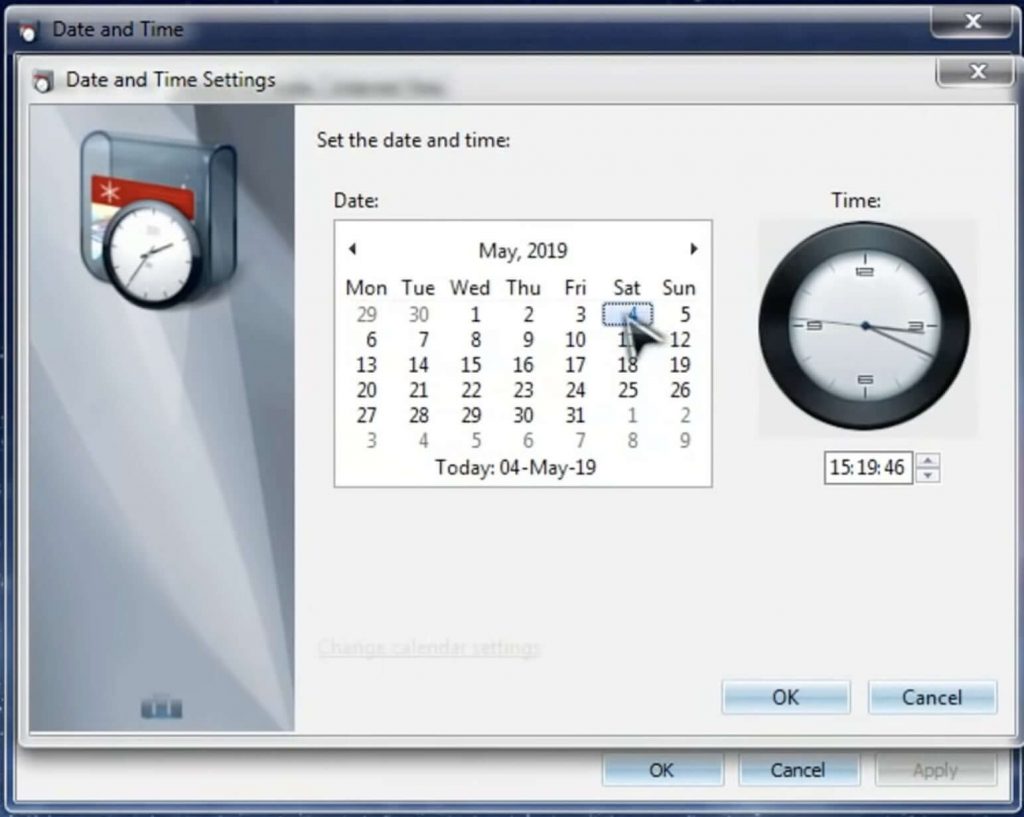
Solution 4 – Update the Date and Time

The problem might connect to the operating system’s date and time settings. If the system’s time zone is not correct, it may cause a conflict with your Firefox browser addons scripts and prevent Firefox from working correctly.
firefox addons not working

Solution 5 – Toolbars and Customization

Firefox allows users to modify toolbars and buttons to their liking and requirements. However, this customization may damage installed addons. As a result, it’s advisable to reset the toolbars and buttons to their standard settings. Simply, reach the menu from the right top, click the label “Customized,” and a window will open, giving the option of restoring to defaults.

Solution 6 –  Enable Saving the History Permission

If the remembering history option is off in the settings, Firefox might disable the extension. Here, using the remember history option may help.

  1. First, go to the drop-down label of setting from the top-right menu.
  2. Then, click the Privacy and Security Option.
  3. In the opened window, select the “Remember History” option
  4. Finally, restart the Firefox.

Solution 7 – Removing Corrupt Profile Storage

Users may encounter problems in addons if Firefox’s profile cache storage is corrupt.  It usually occurs as a result of a broken update or by accidentally moving the operating system files. In this scenario, removing all of the files from the Firefox user profile’s Storage folder may resolve the issue. Now, close the Firefox browser-related task from the task manager, delete all the data inside the profile folder, and restart the pc. Always keep a backup of the essential data.
firefox addons not working

Solution 8 – Configuring the Extension files

Firefox addons may not operate properly if the Extensions.json file gets incorrectly valued. To get the addons to work correctly, try upgrading the Extensions.json file.

  1. As described in the previous step, locate the profile folder and open the extension.json file with a text editor.
  2. Then, using the ctrl + F command, try to find all the terms named “AppDisabled” and change their values from true to false.
  3. After completing the above step, search for “SignedState” and change its value to “2,” updating it from its current value.
  4. Now, save the file and restart the system. Hopefully, it will reset all the problems related to the configuration of the extension files, and the issue gets resolved.

If the above solutions didn’t work for you, the best option is to wait for Mozilla’s official Notes. If everything was working fine previously and all of a sudden, Firefox browser addons have abruptly stopped working or become “unsupported” without any notice and not permitting to install any new ones. Just don’t worry:

Mozilla is always aware of the issues and probably working on the fixes. So It is advised to please fight the urge to create any inventive workarounds that may damage the installed Mozilla Firefox permanently and causing you to lose all the data.

Bonus Tip:

Sometimes we may come across one corrupted Firefox addon that would make the Firefox not working. To find the corrupted addon you can follow following steps.

  1. Restart firefox in safemode.
  2. Disable all extensions.
  3. Restart firefox.
  4. Then enable addons one by one and check the functionality.

Refer the following video if you have any doubts regarding the bonus step.

Conclusion

So, we hope your issue of Firefox addons not working is over by now. However, if you need further clarification on the topics we spoke, please let us know them via a comment. Thanks, and have a great day!

Read More

Here is the Fix for Chrome Keeps Crashing

What is the spooler subsystem app?

Best Guide on how to reopen closed windows?

Android 10 update issues [Comprehensive Troubleshooting Guide]

0

Android 10 is excepted to provide less issues compared to other versions. However, many Android users have complained about Android 10 update issues.  Problems that might occur in Android 10 after the update include apps not able to download or update and a few more. It is not a pleasant experience if you attempt to install an app on your phone but the app wouldn’t install.  If you have concerns about Android 10 update issues, below are few of things you can do to rectify the situation:

Android 10 Update Issues

Quick Fix for Android 10 Update Issues

There are a couple of things that could be responsible for update issues on your Android 10 mobile. 

1: Check Internet Connection

Ensure that you have a stable internet connection before you attempt any update on your Android 10 mobile phone. To solve the poor internet connection issues, you might have to connect to a stable Wi-Fi, change your Internet service provider, or disable any VPN software on your phone. 

2: Free Space on Your SD Card

You might not have a successful update with insufficient space on your phone. After confirming a strong and stable network, the next thing you should ensure before you commence updating your Android 10 is space. 

Android 10 Update Issues

You cannot download an update or install an update if you do not have sufficient space on your mobile phone. Insufficient space can even slow down the update time. That means, to run Android 10 update on a phone with low space capacity will take a longer time than expected. 

Now, let us consider some major Android 10 update issues and how to fix them. 

Answering Calls Issues

Some Android users filed complaints of not being able to answer calls after they performed the Android 10 update. If you are having a call answering issue on your mobile phone, you are not alone. Some users also complained that calls were not connected when picked until about one to two minutes. You know how frustrating it could be if your calls won’t connect until about two minutes. 

Android 10 Update Issues

The calls answering issue after the Android 10 update is not without a solution. However, there is no guarantee that the solution will work for all Android mobile phones. 

Fixing Answering Calls Issue– The best thing to do to fix answering calls issues after the Android 10 update is to clear your phone’s cache. However, if the problem persists you should wait for another update from Google. 

Time Stops Displaying

You know that most, if not all, pixel phones have their time displayed just at the top left side of the status bar.  If time is not displayed on your Android mobile phone after the Android 10 update that means your phone’s System UI Tuner has been affected. 

Android 10 Update Issues

You can solve this problem by downloading a launcher and then ensure you have its settings reset. Nova Launcher is a good choice if you don’t know which launcher to download. 

Automatic Phone Actions

Another unpleasant experience you can start noticing after the Android 10 update is automatic phone actions. Some of the automatic phone actions include automatic phone rotation, automatic brightness, and so on. 

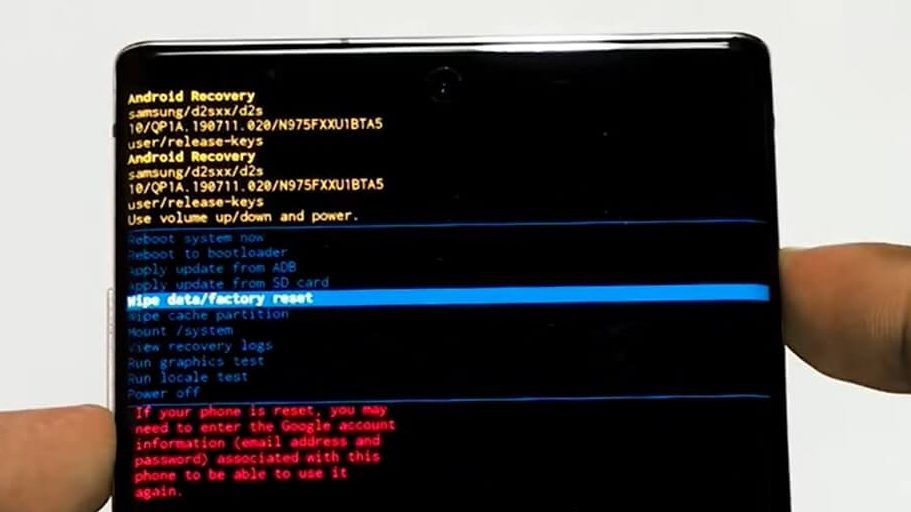
You can fix the problem by simply performing a factory reset.However, factory reset will require you to back up your files and modify your settings. Google acknowledged the automatic actions problem associated with the Android 10 update. However, they ascertained that the problem was caused by a bug when Google verified what was added to Android 10 by Qualcomm. 

Android 10 Update Issues

Good news! Google has promised to fix this problem in the coming update. If you cannot bear with the problem, you can attempt a factory reset.

Bluetooth Audio Not Working Properly

Another issue you might experience after the Android 10 update is Bluetooth Audio to stop working either completely or for phone calls. De-pairing or re-pairing might not solve the Bluetooth audio problem. Most users who had Bluetooth audio problem after updating to Android 10 are the Pixel 2XL users. 

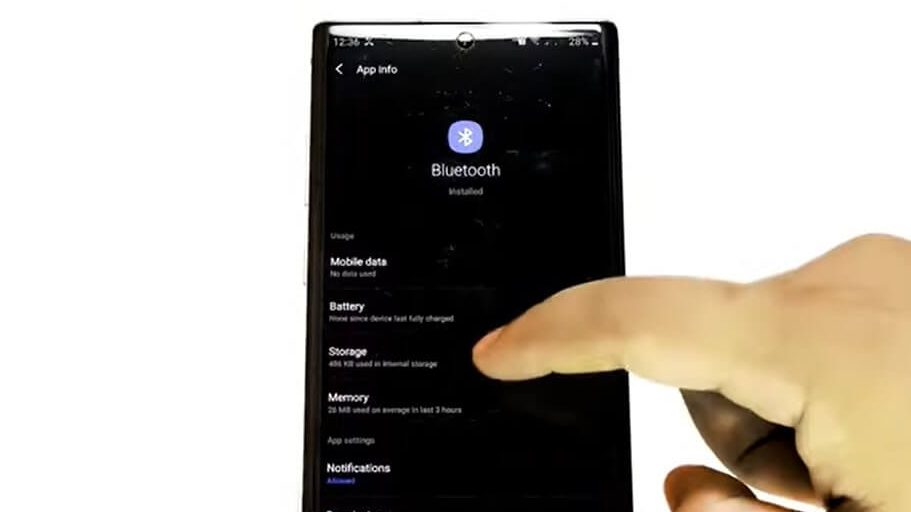
A simple remedy to the Bluetooth audio problem is to delete your phone’s Bluetooth cache memory. You will clear the Bluetooth cache memory from the Bluetooth app on your mobile phone. If the problem is not solved, clear your phone’s memory cache and then proceed to perform a factory reset. 

Android 10 Update Issues

Fingerprint Stops Working

What would you do if your phone’s fingerprint scanner stopped working, hard to think, right? It has been reported by some users that as soon as they update the phones to Android 10, the fingerprint scanner stops working. If you are having a similar challenge, the first step you have to do is to restartyour phone. Next, check if the fingerprint scanner is now working after your Android phone has restarted. 

If the fingerprint scanner still doesn’t work, go ahead and perform a factory reset. Do not forget to back up your files before performing a factory reseton your Android phone. 

Mobile Data Stops Working

This is another common issue that pops up after updating to Android 10. Without your mobile data working, you cannot have access to the internet. 

The way to solve this issue is to change your phone’s VPN settings. To change your phone’s VPN settings, follow the guidelines below:

  • Open Settings on your phone
  • Locate Network & Internet
  • Next, scroll to Mobile Network
  • Going further, select Advanced
  • Next, select Access Point Name
  • From the Access Point Name, ensure that the APNs are changed to ATT Nextgenphone from ATT WAP. 

The above guidelines worked for several users, not for all of them. 

Android 10 Update Issues

Bluetooth Stops Working

You might discover that your Bluetooth stops working after the Android 10 update. Honestly, Android 10 update issues are numerous.

To fix this problem, 

  • Disconnect all paired devices and reconnect afresh. 
  • Clear Bluetooth cache memory
  • Reset your Android mobile phone network. 

Any of the three options above should solve the Bluetooth problem. 

Android 10 Update Issues

Conclusion

One would think, the Android 10 update is problematic even though Google expected it to be smoother than the previous instalments. However, now you know how to deal with numerous issues if something happens with your phone. Do comment below if you still to get a proper solution; we will attend to it ASAP.

Meanwhile you can check the Fairphone forum to refer for the Known bugs & problems with Android 10.

Read More

What is the spooler subsystem app?

Spotify chrome extension for an unlimited music experience

How to reopen a closed window?

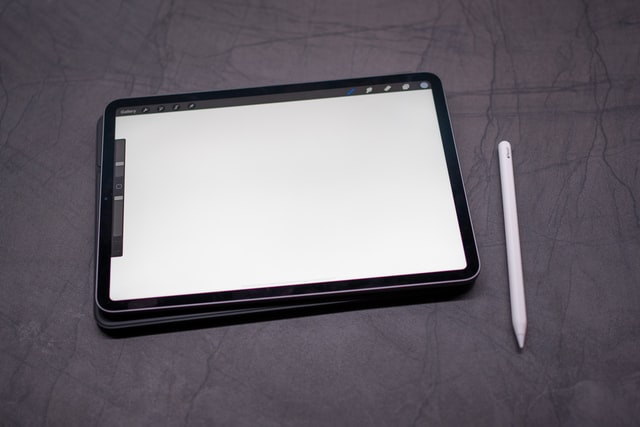
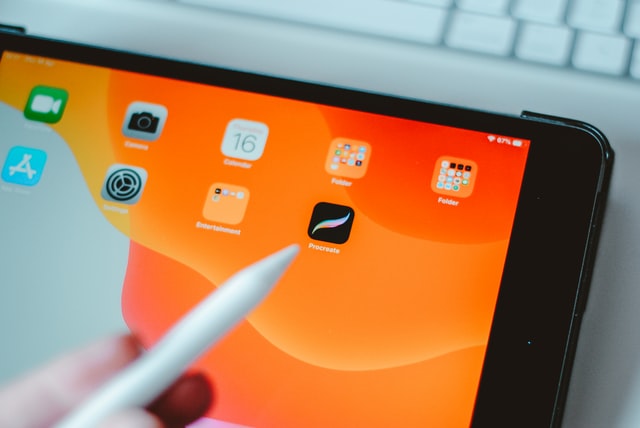
6 Troubleshooting Methods for Apple Pencil not working

0

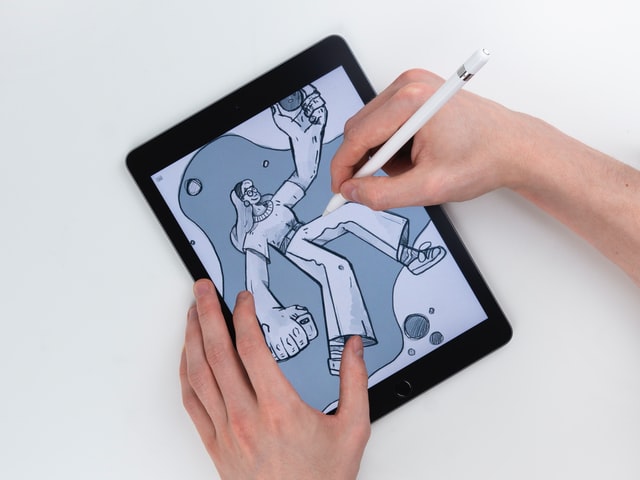
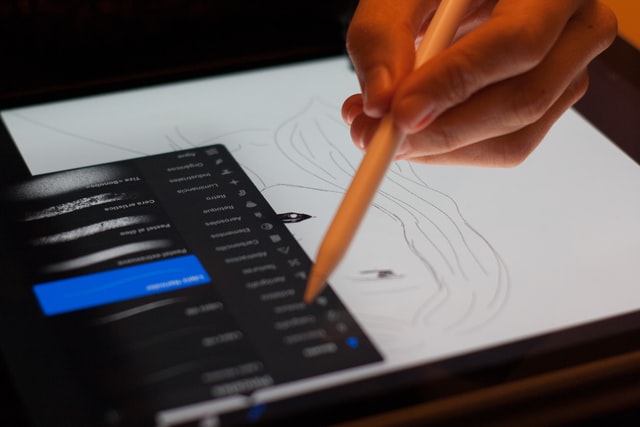
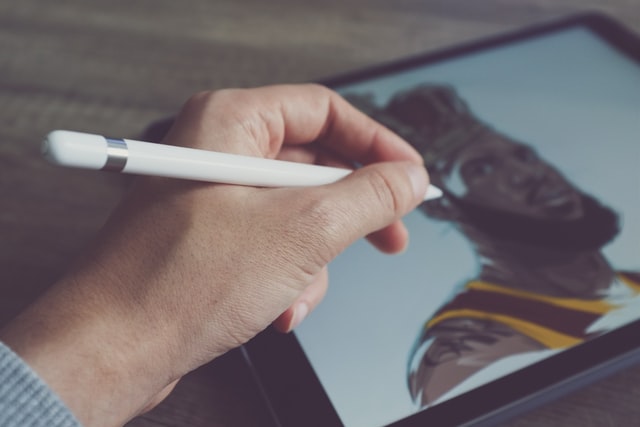
Electronic devices are bound to break at some point regardless of the quality of the built. However, in certain situations, you might encounter malfunctions or issues on your devices even when they are not truly broken. Generally, Apple devices work smoothly compared to most competing products; that is a fact. But, it doesn’t necessarily suggest that they are not everlasting or don’t bring you issues. So, if you are thinking about why Apple Pencil is not working, we are confident that we have the solutions you have been searching for.

Troubleshooting – Apple Pencil not working

1. Connect it to a power source

Perhaps your Apple Pencil is not working because its battery is out of juice. So, first things first, try connecting it to a power source and let it charge for a moment. You can notice the charging process of the Apple Pencil via your iPad.

If your Apple pen isn’t working even after the recharge or you observe that it is not charging, you can think about the next step.

Apple Pencil not working

2. Restart the iPad

The issue might not be with the Apple Pencil but the iPad. If you find issues in accessing the Apple pencil even after you recharge it properly, it would be better if you inspect the problem after rebooting your iPad.

You can restart your iPad as you normally do by holding the power button and swiping the slider on the screen. This can fix minor glitches, and more often than not, you will see the Pencil works again flawlessly.

Apple Pencil not working

3. Double-check the compatibility

If you still find the Apple Pencil is not working, our recommendation would be to double-check on the compatibility of your Apple Pencil with the iPad you use. This step particularly applies to those who bought a new Pencil or iPad. 

So, how to check the compatibility of an Apple Pencil? This is how you do it.

The first generation of Apple Pencils works with: 6th and 7th generation iPad/ 9.7 inch, 10.5inch, 1st or 2nd generation 12.5inch iPad Pro/ 5th generation iPad mini/ 3rd generation iPad Air.

The second generation of Apple Pencils works with: 3rd and 4th generation 12.9inch iPad Pro/ 11inch iPad Pro.

Apple Pencil not working

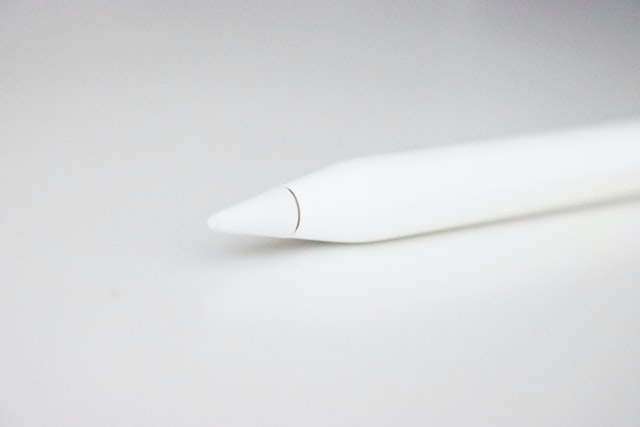
4. Check the Pencil tip

This is a commonly found reason for “Apple Pencil not working.” If the tip of your Apple Pencil becomes loose, you may find errors in the functions. So even though it appears properly connected with your iPad, the performance won’t be the same. In order to tighten up the tip of the Apple Pencil, all you have to do is hold the Pencil tightly and turn the tip clockwise until you feel it is stopped moving.

However, this will be a temporary fix for this issue if the tip is old or has been damaged. If so, you will have to consider opting for a new one to be able to work with Apple Pencil smoothly.

Apple Pencil not working

5. Re-check the Bluetooth connection

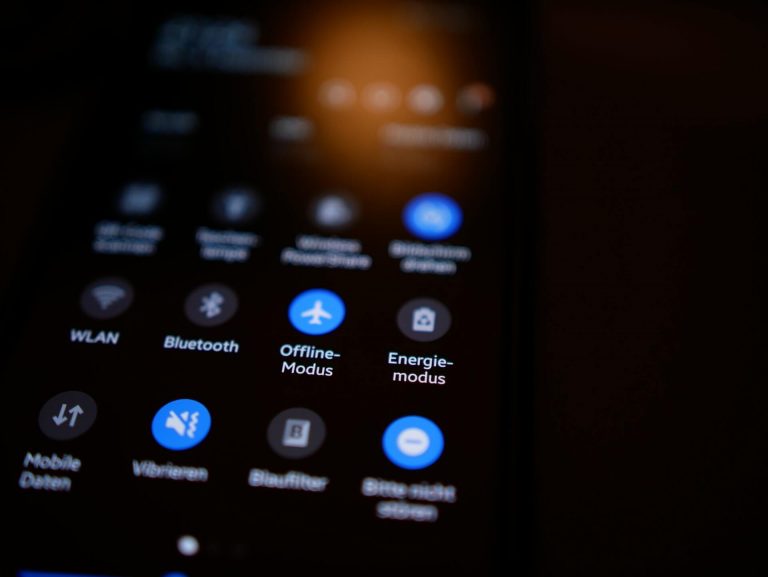
As you would know, the Apple Pencils connect with the iPads via Bluetooth technology. So, verify whether the Bluetooth connection is turned on before blaming the devices. We have seen many users worrying and trying various troubleshooting methods without knowing the Bluetooth connection is not turned on.

In addition, try disconnecting and reconnecting the Bluetooth if the connection is already on, as giving a fresh start can be helpful in such circumstances as well.

Apple Pencil not working

6. Re-pair the Pencil

It’s not repairing, but re-pairing! This is probably the last method we can suggest to you, and it works in most situations as far as your Apple Pencil has no hardware issues. Bluetooth re-pairing tends to fix Apple Pencil not working issue, and it will let you determine whether there is a hardware-related problem as well. If you don’t notice the Apple Pencil on the list of devices when re-pairing, it says that there is an issue that is beyond the reach of your technical knowledge.

This is how to repair Apple Pencil with an iPad

Go to the Bluetooth settings of your iPad and navigate to the Apple Pencil in the already paired devices. Then, press on the “info” button in front of the name and press “forget the device”; confirm the action by tapping OK. Now, try repairing the Apple Pencil with the iPad.

Apple Pencil not working

Seek the help of Apple

If you have tried all the above troubleshooting methods with no positive results, there is a possible hardware issue with your Apple Pencil. If so, you will have to contact Apple and inform the issue. Suppose the device is still under warranty and there is no physical damage or water-related injuries. In that case, Apple will likely replace it with a new Apple Pencil within a short period of time.

If you are wondering how to contact Apple, Please click here.

We hope our troubleshooting guide has helped you and if you need further clarification, please let us know via a comment. Have a great day!

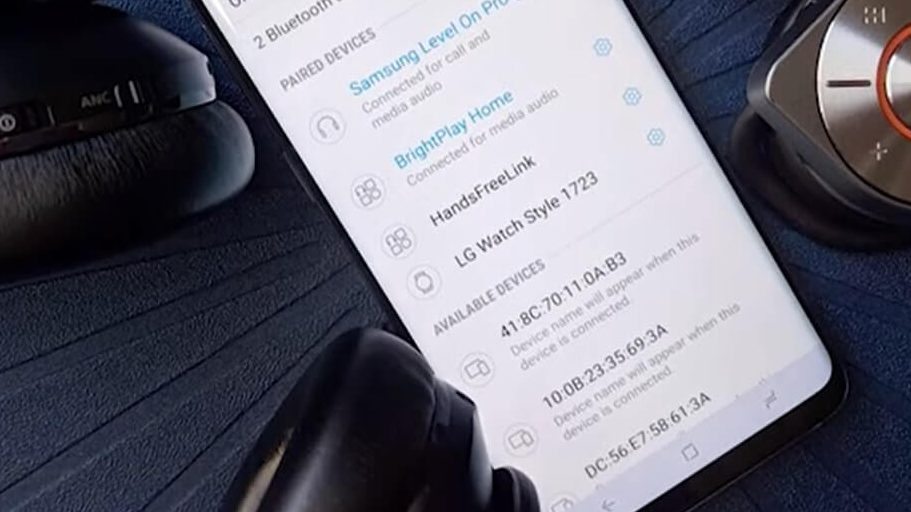
Best 6 Fixes for Bluetooth won’t connect android Device

Although Bluetooth technology is nothing new to the world, people still come across different types of issues day in day out. This doesn’t necessarily tell that Bluetooth is an awful technology; but the devices that we use in between can cause a variety of issues inevitably. A classic example of such a situation is the “Bluetooth won’t connect Android” issue.

Bluetooth Won’t Connect Android

If you have ever used a device with a Bluetooth connection, no wonder you have faced this problem at least once in your life. Obviously, the next thing that hit our minds is that there is something wrong with the hardware of the device that we use. However, that is not the case in most scenarios. More often than not, all it requires is just minor fixes. We have rounded up six such solutions. If you are suffering from Bluetooth won’t connect Android right now, you have landed on the right web page to get the solution you have been searching for. Let’s start the article without further ado.

Fixes for Bluetooth Won’t Connect Android

If your device is experiencing Bluetooth pairing issues or you find it difficult to establish a Bluetooth connection on your Android device, this is what you have to do.

Bluetooth Won’t Connect Android

Switch off and on the Bluetooth connection

When Bluetooth is not working on Android, this is the first step you must do. It may sound basic, but never underestimate the efficiency of this step. Just slide the Bluetooth bar off and turn it back on after 10 seconds. Now, try again to connect to Bluetooth.

Bluetooth Won’t Connect Android
Bluetooth Won’t Connect Android fixes

Remove the battery of your Android

After a simple and straightforward method, this may sound a bit outrageous for most. However, pulling the battery out of an Android acts as a soft reset and can fix “Bluetooth won’t connect Android” after the restart. But, you have to pull the battery when the device is on, and you must wait at least 30 to 45 seconds before turning the device on.

Keep in mind; not all smartphones are designed with removable batteries. If your device doesn’t have this feature, do not try this step, and it would be better off trying the next step.

Clear the cache of Bluetooth

Another probable reason for Bluetooth not connecting on Android is that the cache of the Bluetooth application. You can perform this action by visiting the application manager of your Android device, and if you don’t notice the “Bluetooth Share” app on the application list, you will have to click “more” and navigate to “system apps.”

Bluetooth Won’t Connect Android
Bluetooth Won’t Connect Android fixes

From there, scroll down to the “Bluetooth Share” app and press on “clear cache.” Usually, the “Bluetooth Share” is the name of the Bluetooth app on Android, but on certain devices, the name could appear as only “Bluetooth.”

Similarly, you can clear the accumulated data as well. The “clear data” button also should appear near the “clear cache.” You should clear both these before you exit from the Bluetooth app. Now, slide the Bluetooth bar off and switch it on after 10 seconds.

Remove all previously paired devices

To get a fresh start, you can remove all existing paired devices on your Android smartphone. There can be many devices that you have previously paired for once, and not going to use them again in the future. Go to the Bluetooth settings of your phone and turn the Bluetooth on. Now you will see all the devices that you have previously paired on the device.

In the settings of each device, there should be an option to un-pair; click on this one by one at a time until you get rid of all the devices. Now, try to pair with the device you want.

Bluetooth Won’t Connect Android
Bluetooth Won’t Connect Android fixes

Inspect the pairing device

Pairing a device is not a painstaking job, and it can be done within few easy steps. If you see everything is in order on your side, check the condition of the other side before coming to a conclusion. So, it’s important to follow all the methods we elaborated on the pairing device as well. Also, it would be best to involve a third-party device in the process to identify the erroneous device.

Bluetooth Won’t Connect Android
Bluetooth Won’t Connect Android fixes

Hard reset

This is the last step you have in your armoury to try. Factory reset usually fixes most of the software-related issues of an Android, but it comes at a cost. It will erase all of your data, but it’s the worldwide accepted remedy for viruses and glitches. A hard reset would bring the Android to the state that you purchased. Also, it will surely fix the “Bluetooth won’t connect Android” as far as there is no hardware issue on the device. We hope our article helped your concern; if you need any clarification with this regard, please comment on them below; our team will respond to you as soon as possible. Have a great day!

Bluetooth Won’t Connect Android
Bluetooth Won’t Connect Android fixes

Videos Not Playing on Chrome Browser? Here are the Solutions

0

We all know the popularity of Google Chrome and how sophisticated it is. Chrome is light-weighted, super-fast and super-responsive compared to most other web browsers. However, flaws are part and parcel of the game, and it’s the same for Chrome as well. There can be instances that videos not playing on Chrome browser; and an ordinary user can get confused trying to figure out what’s the fault. Don’t sweat; we are here to help you.

videos not playing on chrome

Videos Not Playing On Chrome – Solutions

Quit and restart Google Chrome

If you come across videos not playing on Chrome, this is the first step you have to do. In most cases, this simple method is more than enough to overcome the situation. When you browse multiple videos in different tabs for a considerable period of time, Chrome can cause lags in the videos. The restarting of Chrome can be done in various ways, and the easiest is to type Chrome://restart in the address bar of the browser and press enter.   

This will bring Chrome to a kill within few seconds, and you can try playing the same video again after restarting the browser. If this doesn’t help you, move on to the next method.

videos not playing on chrome

Clear the Cache

The cache works as a temporary memory or storage that helps Chrome provide you with the data quickly on the internet. This tells you that Google Chrome is using the cache of the browser to play video smoothly. However, you have to clear the cache data once in a while to work smoothly with Google Chrome and clearing the cache is as easy as ABC. 

Click on the three dots on the top right-hand corner of the Google Chrome browser and click history. Else, you can press CTRL + H to access the history of your browser. Then click on the clear browsing data on the left side of the window. Here, you will have to clear browsing history and cache for all time. It will take about one minute to clear the cache depending on the amount of collected data. After the deletion process, quit the browser, restart and check on the error.

videos not playing on chrome

Reset Chrome

There are loads of settings available on Google Chrome to play with. If you make changes to these settings without knowing how they work, you can end with errors like videos not playing on Chrome. In that case, you have to reset the Chrome to its original state if you don’t remember the settings you altered. 

The best part of resetting the settings is that doing so will have no impact on your saved passwords, history or the bookmarks that you have created on the browser. But, keep in mind that this step will disable the extensions, and it will reset the startup page as well. If you are ok with it, hit reset settings. Also, uncheck the box that says “help make Chrome better by reporting the current settings”. 

videos not playing on chrome

Update Chrome

Running on the latest available version of Chrome is imperative as these updates are helpful to fix a variety of malfunctions. Usually, you have to do nothing to get the latest updates. The Chrome itself automatically installs updates when you are starting the browser. However, you can check for the updates manually as well.

Go to “Help” by clicking the three dots on the upper right side of the browser. Then, click on “About Google Chrome.” Here you will see whether your browser is running on the latest version or is there an update available to install.

videos not playing on chrome

Disable Chrome’s Hardware Acceleration

The browser uses this feature to enhance the performance in order to load websites faster for you. When you enable this option, Google Chrome will use all available resources such as GPU and CPU to the fullest to accomplish the job. If you work with multiple heavy-duty tasks in multiple tabs, it will hamper the CPU; the hardware will become too busy to cater to all of Chrome’s requests.

If you experience videos not playing on Chrome, you can mitigate the problem by simply disabling this feature. Go to settings and type hardware acceleration in the search bar. You will see an option saying “Use hardware acceleration when available” underneath the search bar. Disable the feature and try the videos again. That said, please note you have to enable this feature again if you encounter a sluggish browser after the disabling.

videos not playing on chrome

Use different browser

If you are still facing the issue, it would be a good idea to check the same video on a different browser. Perhaps you are dealing with an erroneous video file. Also, you can consider downloading the video and watch them offline if the issue persists. 

Here are a list of other browsers that you can use instead of Google Chrome.

Refer this video if your issue was not fixed by the above options.

Actually, you have slim chances to experience videos not playing on Chrome if you follow the above methods. Have a great day!

Read More

Here is the Fix for Chrome Keeps Crashing

What is the spooler subsystem app?

Best Guide on how to reopen closed windows?

Pros and Cons of Linux Operating System

0

What are the pros and cons of Linux? This is a common question among the people who are fed up with Windows or Apple. Also, this explains that you have comparatively less knowledge about Linux and how it works. As humans, we tend to inquire about everything possible before making the final call, which is indeed the right thing to do. Let’s get started.

Before we start the article, note that it is not anything like “Linux from Scratch,” and our primary objective is to provide you with the pros and cons of Linux. However, we feel it would be best suited to start the piece by defining Linux First.

pros and cons of Linux

So, what is Linux?

Linux is an OS (Operating System) like Windows, and it bridges the communication between software and hardware for the users. In addition, it is an open-source system, which means users can share the modified version with the world without any limitations.

Let’s jump to the core part of the article; you will get to know more benefits and drawbacks in a comprehensive manner.

pros and cons of Linux

Let’s talk about the advantages first.

Pros of Linux

Linux is open-source

As mentioned, Linux is an open-source OS, and those who have coding knowledge have the luxury of editing and work as they prefer with the operating system. The best part of Linux is that it is completely free to use, unlike Windows or MacOS. If you are on a budget and thinking about a Microsoft Windows alternative to work freely, Linux would be one of the best options to consider.

pros and cons of Linux

It works fine with Chrome and Firefox

There is no point in deviating to an OS that has no power to cater to contemporary internet needs. As you know, Google Chrome and Firefox are two of the most popular internet browsers in the world. Linux works flawlessly with both browsers; however, if you are a fan of Internet Explorer or similar browsers, you will have to stick with Windows or the one you are currently using.

Speed

Linux has a simple and less complicated interface, which is one reason it works fast. In addition, it won’t demand you to install memory-consuming anti-virus software to check viruses and malware. This can come in handy to save a considerable amount of memory and obviously for a speedy computer.

pros and cons of Linux

Easy to install

This is one big plus point of Linux. Unlike Windows, you don’t have to convert to Linux straightaway to test and try its functions. You have the cushion of booting Linux from an external drive or CD and enjoy the OS from there. There is no requirement to make changes to your hard drive. So, it is a win-win situation.

Better security

Linux is considered one of the best when it comes to the security side of things. The open-source nature of the OS is the biggest reason for this priceless advantage. Since thousands of developers around the world are working inside the platform, they often look for harmful viruses to keep everything secured.

On the other hand, Linux has a fewer number of users compared to Windows in particular. So, virus creators hardly target Linux as the victim. All in all, Linux is secured than most of the so-called “best-operating systems.”

pros and cons of Linux

Cons of Linux

It’s time for the drawbacks.

Steep learning curve

Using Linux is not the easiest job in the world if you are an ordinary user who has not much knowledge about operating systems. The less user-friendliness at the initial stage can make you move away from the platform pretty quickly if you are not willing to put some hard yards.

Limited applications to work with

This is one of the biggest disadvantages of Linux, if not the biggest. Not all apps are built to work with Linux. So, you will have to examine the feasibility of each software program that you plan to work with this new OS before you think about the switch. For example, suppose you prefer Microsoft Excel as your go-to spreadsheet application. In that case, you don’t have the opportunity to use it on a Linux computer, as there is no Linux version available on Microsoft Windows applications.

pros and cons of Linux

Less compatible with games

Gamers, look away. Your favourite game has less chance to work with Linux. Developers don’t want to consume their much valuable time on something that is not lucrative. As of now, most big brands release their games without the Linux version. We feel this is a definite reason why young users are not among the fans of Linux.

Conclusion

So, the final decision is up in your sleeves as you now know the pros and cons of Linux. However, our suggestion would be to try Linux as a dual boot and work with it for some time before you go all guns blazing. Either way, we love your thinking behind trying Linux, and if you need anything from our end, we are always there to help you. Cheers!

Read More

What is the spooler subsystem app?

Spotify chrome extension for an unlimited music experience

How to reopen a closed window?

Why is my iPhone Hot? [REASONS and SOLUTIONS]

Most people buy iPhones to get rid of previous problems they experienced using other brand smartphones. Perhaps your case is different to this. Whatever the reason you had to opt for an iPhone, you want it to work as smooth as possible. In that sense, it’s obvious for you to think, why is my iPhone hot? We have investigated this issue closely and found the reasons and fixes for this excruciating issue. Let’s dive in and see.

Why is my iPhone hot?

iPhones are more or less similar to computers. You can perform almost all the tasks you do on your computer with an iPhone. They have tiny little components inside that are similar to a computer. But, there is one major ingredient missing in a phone compared to a computer. Can you guess what that is? Yes, poor iPhones don’t have a fan inside to keep everything cool when they work hard for your duties.

Why is my iPhone hot

However, iPhones usually don’t need the help of a fan to remain cool to prevent overheating as far as everything is in order. If you have adequate knowledge about the inner components of a computer, you would know the primary job of the computer fans is to keep the CPU cool. Because the CPU is the unit that heat up quicker than other parts, the same thing applies for iPhones as well.

So, why is my iPhone hot? Now you know it’s because of the CPU.

Why iPhone CPU gets hot?

Similar to PCs, your iPhone also needs more power to start up an application. However, the CPU of an iPhone uses not more than 5% of its overall capacity to function, and it is very powerful. But, the more apps are opened on the phone, the more it will work hard.

Why is my iPhone hot

More often than not, overheating of iPhones is due to software malfunctions. That said, if you have previously encountered a hardware problem on your phone that can be the wrongdoing for the issue as well.

Let’s dig deep into the matter and see what you can do when your iPhone is hot.

Why is my iPhone hot? Reasons and Fixes

Quit the apps

Now you know the workload has a say on this problem. So, the first thing you have to do is minimize this workload as much as possible by quitting the running apps. You can execute this task by following the below step.

Why is my iPhone hot

Double click on the home button of your iPhone and swipe the apps to bring them to a quit. Once you close all the apps, wait for 10 to 15 minutes and see how your iPhone reacts after that.

Investigate on crashing apps

As you think, why is my iPhone hot? Similarly, think what are the apps that crashing on my iPhone as well. Also, consider whether the overheating issue popped up after the installing of a certain app. If that is the case, it won’t take much of an effort to bring your iPhone back to its usual state. Try the below-mentioned process to identify the crashing apps on your phone.

Why is my iPhone hot

Go to Settings > Privacy > Analytics and Improvements > Analytics Data. Please note that all the entries that you see here are not crashing apps. However, if you see one or few apps mentioned several times on the list, then there is an issue with that particular app/s.

Restart your device

Although it seems an obvious and simple way to try, restarting the iPhone can fix such kind of issues without the need of any other painstaking methods. We are not going to elaborate on the restarting process of an iPhone device as it is just a cakewalk. It will take about 20 to 30 seconds to power off; then restart the device, let it sufficient time to rest and try using again.

Why is my iPhone hot

Update the apps

Almost all the developers make changes to the existing versions of their apps to enhance the user experience. In order to apply these changes, you have to update the apps to the latest versions. In addition, updates are pretty helpful to fix the bugs. You can visit App Store and your account to inspect the available updates of apps. Here you have the opportunity to update all apps in one button press or do one by one.

Other than the above, the following methods also work fine on overheating iPhone devices. So, have a crack at them as well.

Why is my iPhone hot
  • Reset all the settings
  • Restore the iPhone
  • Go for a repair

Before we say adios, we would like to remind you again that iPhone overheating issue usually is a result of erroneous software programs. So, it would be ideal for checking all the steps we explained before seeking the help of a professional. Because these methods are not Himalayan tasks to try even you got little to no tech knowledge. Have a great day!

You may see the following video for more clarification.

Why is my iPhone Hot

Read More

How to free up space on mac?

How to open task manager Mac?

How to put an iPad into iPad recovery mode?

How to put an iPad into iPad recovery mode?

0

Activating the recovery mode on your iPad is street forward. Touch the Sound up key and quickly lose it. Follow the same process to the Volume down button and remove it. Now press and hold the sleep button at the top of the device.

 It will restart the device in a few seconds. Keep holding the sleep button until the iPad goes into recovery mode.

ipad recovery mode

Next, the popup window will appear with the popup message of the data restore or update process. You have 15 minutes to give your confirmation, or the notice will disappear. 

You may have to follow the above step again to get into recovery mode. When the popup box appears, click the Update.

Updating the exiting application would solve the major problems, and your iPad will start working as expected. 

We will update the device instead of using the Restore method. The update feature checks for the missing files as well as fix the problem with the existing files. 

ipad recovery mode

In most cases, updating your device would solve the problem. Update also a secure way to save your existing files and only fix the core files causing the issue. 

In case after updating the device, the issue persists, try to use the Restore method. Remember that the Restore method deletes all the files and content of your iPad. 

Take a backup of your files before running the restore process. Once the data lost, you will not be able to recover it. 

It is a good habit to keep taking backup of your iDevices. It will preserve your essential files in the alternate folders, and when your device start showing the problem, you can recover the file from the backup folder.

ipad recovery mode

How to recover from an iPad stuck in recovery mode?

Before you start applying the below method to fix the error, ensure that you have updated iTunes on your PC. 

1) Go to settings > iCloud > Turn off “Find my iPad.” 

2) Connect your iPad to the PC using a USB Cable.

3) Now run iTunes on your PC.

4) When iTunes detects the connected iPad, it will show the message that your iPad is in recovery mode.

5) Click OK to begin the restore process.

6) Your iPad will reboot to initiate the restore process to take the iPad software to the factory setting.

Note: The restore process deletes all the files. So if you have data on it, you should take a backup before running the restore process. The method applies to both iPad pro and iPad air device.

ipad recovery mode

Why do you need to update the iPad? 

iDevice users might have encountered trouble accessing the iPad feature due to software errors. 

iPad may behave strangely in such a situation, and you will have not idea how to fix the problem. You will be ready to do whatever needs to be done to recover your iPad from the error. 

The only way to fix this problem without damaging the core functionality and software is to use an entirely safe recovery mode. 

The recovery mode would help you reset the device and reinstall the operating system to normalize the iPad. 

ipad recovery mode

You can use the iTunes application to turn on the recovery mode and let the iTunes application analyze the damage and process the recovery mode to fix the problem.

 How much time iPad recovery mode generally takes?

The recovery process of the iPad is quick. However, sometimes it may take several minutes to complete the Update or the restore process. The recovery mode analyzes the data and fixes any error it finds in the software. If your iPad has several applications installed on the device, then analyze those files would take some time. 

If it is connected to the iPad’s core functionality, the recovery mode may require more effort to fix the problem. Hence the duration of the recovery would be longer. 

ipad recovery mode

It would be best if you run the recovery mode at night. When you wake up early in the morning, your device will be ready with the updated OS. 

iPad recovery mode is the safest way to get your device back to normal. It saves your repair cost and allows you to fix the problem without needing technical knowledge. Once the recovery method is activated, the rest of the process runs in the automated mode. 

You do not have to monitor it or give any manual inputs. The iPad application will detect the problem and fix it with new files. 

Final Verdict:

Consider a data backup when you run the recovery mode. All upload your essential files to the iCloud server. 

In case your device is not working, you will be able to access the files on another computer or device. The recovery process would remove all the files and applications. You would have to download the application again on your device. 

ipad recovery mode

Read More

How to free up space on mac?

How to open task manager Mac?

Cannot connect to app store

How to Empty Trash on Android Smartphone?

You don’t type on Google how to empty trash on an Android smartphone until your phone becomes slow, isn’t it? Typically we, humans, search for answers only after the questions arise. Anyway, that is a different story. If you notice your beloved Android smartphone is not functioning as it was or as it should be, maybe it is because your phone is full of trash. However, this isn’t the most challenging job to rectify and today’s article is all about how to empty trash on Android smartphones; let’s get started.

How to Empty Trash on Android

The accumulated trash on your smartphone can cause various problems; the most prominent one is storage issues. If the app you are trying to work with doesn’t have sufficient memory to cache, it starts working slowly. When you have multiple apps running at low memory conditions, obviously, your device will get slow. Before we start finding remedies for this issue, let’s see what this trash that we are talking about.

What is trash on Android phones?

Usually, there are different types of trash files on your Android phone. But, the one we need to worry about in terms of the speed of the phone is cache. The cache files are created by all the apps that are on your smartphone, and they are pretty useful to optimize your device to run faster. However, if you allow these files to accumulate for a considerable period of time, it will lead your phone to function slowly.

How to Empty Trash on Android

In addition, there could be folders created by apps that you have deleted previously. Although the app is no longer available on the phone, there is a possibility that the folders are still stored and consume the memory of the Android.

How to Empty Trash on Android Smartphone?

As you now know what the real trash is on your mobile, let’s focus on how to clear them to minimize the frustrating lags on your android device.

How to Empty Trash on Android

Remove WhatsApp junks

WhatsApp is the most used messaging app in the world, and most users have it on their devices. It is not a trash app by any means; however, what you don’t know is, WhatsApp tends to keep a considerable amount of trash files in it. By default, it saves various types of files. For example, if you have opted for backups on WhatsApp, there can be daily backup files saved on the device; in addition, as you know, it saves the sent files, status of the files and many more you really don’t want.

Clearing trash files on WhatsApp can save you a huge amount of memory capacity, even up to 1GB depending on your usage. Here is how you clean junk files on WhatsApp.

How to Empty Trash on Android

First, open file manager on your device and head to the WhatsApp folder. This particular folder can be either in the internal memory or SD card’s memory. Click more or menu to see the trash files and you can delete them from there. Also, you can delete all the unnecessary files associated with WhatsApp in this method, including the backup files.

Delete all cache of apps

In this way, you have the luxury of cleaning the entire cache of your apps. If you are in search of how to empty trash on Android, this is one of the easiest yet powerful methods of executing the task. Click Settings on your smartphone and visit Storage. If your device is full of stuff, it will take few seconds to calculate the memory and show you the figures.

How to Empty Trash on Android

Then, you will see the cache of your Android smartphone. Press on the cache and it will ask you to confirm the deletion attempt.

Use a third-party Application

This is another way to empty trash on Android smartphones. There are excellent third-party applications available on App Store to help you get rid of junk files. In addition, typically, this method is highly efficient compared to the above two options. Because these cleaning apps are built to do one thing, that is removing trash out of your Android phone. On the other hand, they are super easy to use, even for the rookies.

In addition, cleaning apps usually have the capacity to search for hidden trash files on Android phones. However, when selecting such apps on Apps Store, make sure you opt for less RAM-consuming ones and check the previous user reviews about them. According to our research, we recommend the CCleaner app to clean the junk files, and it is a popular cleaning among Android users for a considerable period of time.

How to Empty Trash on Android

There is a article on Best Android Cleaner App. Read it here.

Conclusion

So, now you know how to empty trash on Android smartphones. You got the solution for lagging phones in your armory. See whether they do the job for you; we bet they should. If you have further clarifications on this topic, shoot us a message; we are here to help you. Have a great day!

Read More

What is the spooler subsystem app?

Spotify chrome extension for an unlimited music experience

How to reopen a closed window?

Windows 10 Taskbar Not Working [Easiest Solutions Explained]

0

Let us start by saying that Windows 10 taskbar not working is not a problem that you need to worry about. It’s a common error most Windows users face. When this happens, you will notice the taskbar not respond to your commands; even you won’t be able to move the cursor over your taskbar. Don’t pull your hair out; this is nothing but a minor issue that you can fix in simple methods; it’s as simple as ABC.

How to Fix Windows 10 Taskbar Not Working?

Quit and restart the Windows Explorer using Task Manager

Task manager is the go-to option for various kinds of Windows issues, and the same can be done in this situation as well. Also, this is the easiest fix for the Windows 10 taskbar not working issue. Here is how you do it.

Windows 10 taskbar not working
Windows 10 taskbar not working fixed

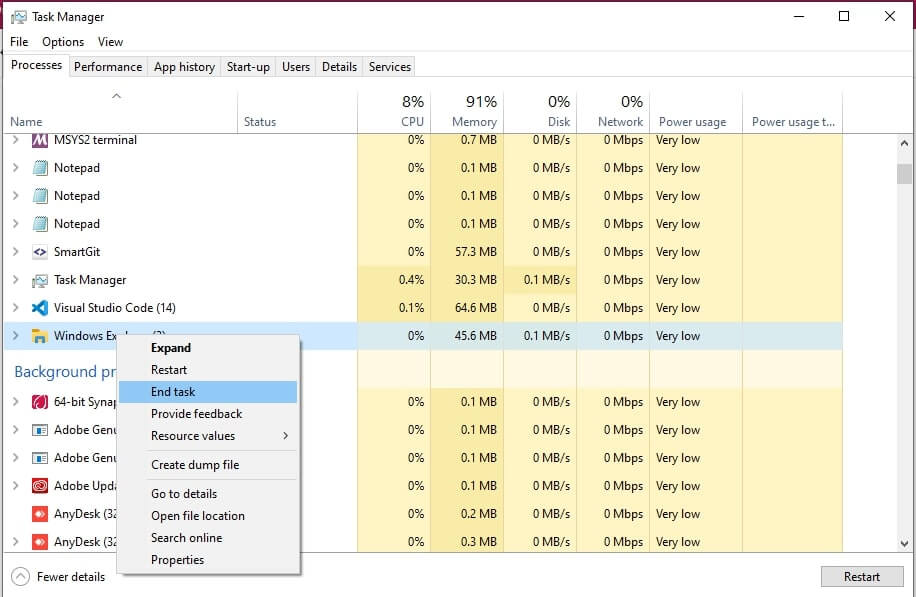
Press Ctrl + Shift + Esc to open the task manager. Then click on the “More Details” button right at the bottom of the task manager window if you don’t see the Windows Explorer on the Processes tab. Now click on Windows Explorer and right-click to restart. Right after you click on the restart, you will see the taskbar disappear from the desktop screen. It looks a little bit intimidating when this occurs, but there is nothing to worry about. It may take one minute or so but will return to the normal state.

Now, check whether the taskbar properly functions or not. In most cases, it should start working after this step; if it doesn’t, let’s move onto the next method.

Restart your PC

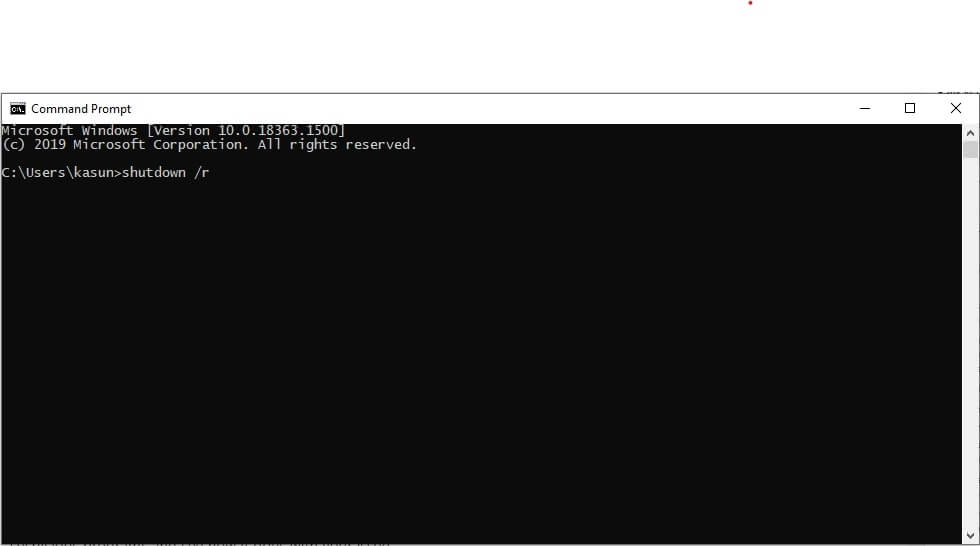
It’s like mom’s love; you always get answers to your problems. Close all the active windows on your PC and go for a reboot. Frankly speaking, this error usually gets fixed after a restart, and you can expect the same thing is happening in your case, hopefully. If not, now it’s time to focus on advanced sorts of methods.

Windows 10 taskbar not working
Windows 10 taskbar not working fixed

Check on the startup programs

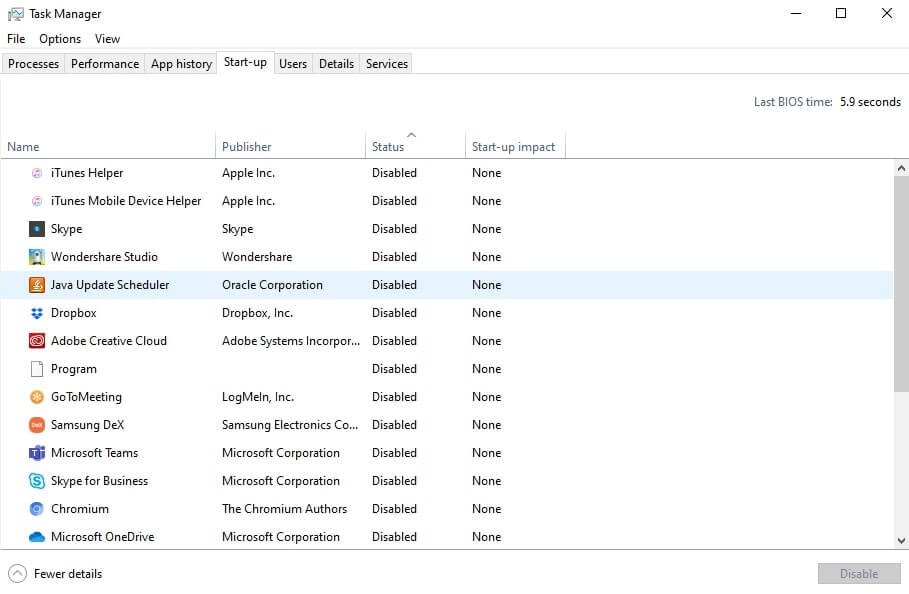
Another reason for Windows 10 taskbar not the working problem could be the startup programs of your computer. There is a possibility of certain apps causing issues to the taskbar to malfunctions, and you can test this by removing the applications from the startup launch.

Go to settings > Apps > startup, and you will see the list of programs that spontaneously starts when you switch on the PC. On the right side, against the name of each application, there is a blue slider. Disable the suspicious programs and see how it goes with your issue.

Windows 10 taskbar not working
Windows 10 taskbar not working fixed

Check for the driver updates

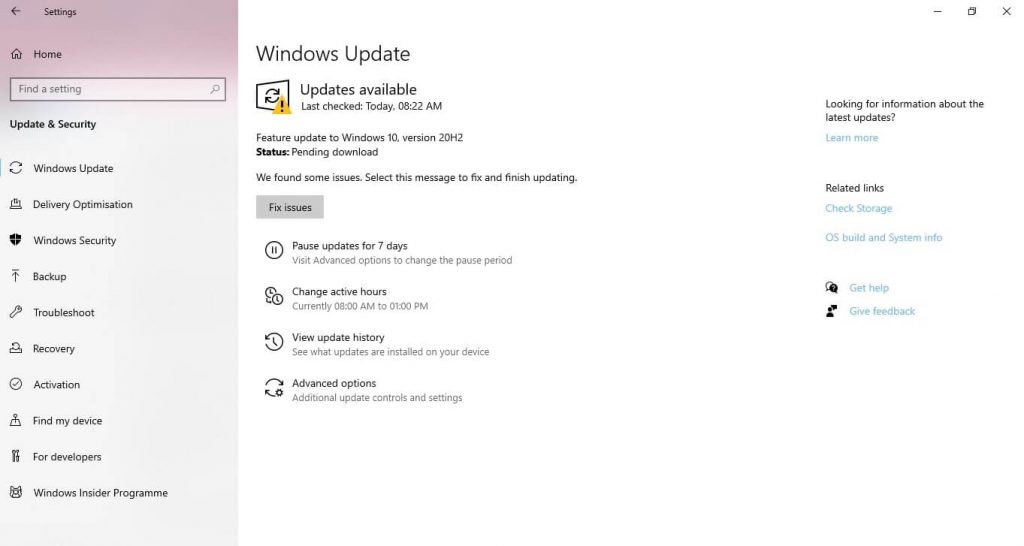
Outdated display drivers also can be the culprit for the muddle. So, it would be worth a try to update them to see whether the solution lies there. In addition, please check on the Windows updates as well. Go to Settings > Update and Security > Windows update. Sometimes, this is all you have to do to overcome this annoying situation.

Windows 10 taskbar not working
Windows 10 taskbar not working fixed

Try a different user account

Unexpected and unintentional actions can impact the core functions of the Windows 10 system. The issue that you are currently facing could be a result of such action. You can verify it by using another account on your PC. It will let you realize what the erroneous action was, and you can rectify it accordingly. Most Windows users have only one user account attached to their computers, and if you also fall into that bracket, here is how you create a new account.

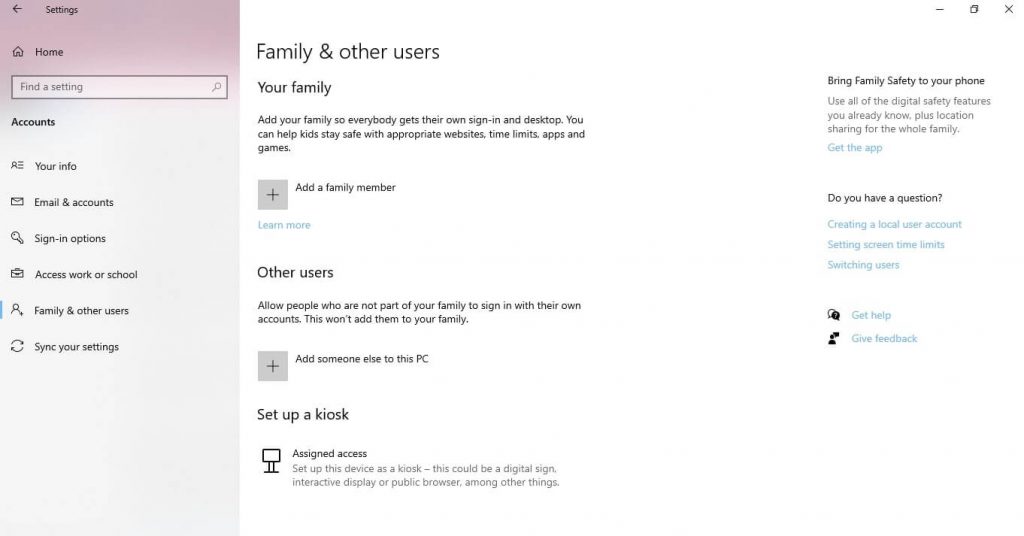
Visit Settings > Accounts > Family & other users > Add someone else to this PC. After you create a new user account, click on the Windows button and log out from the existing user account. Now, log into the newly created account and see whether it works.

Windows 10 taskbar not working
Windows 10 taskbar not working fixed

Apply a previous Windows update

This may sound a bit bizarre for most; because Windows updates usually are the solution for loads of minor errors, and they are not bound to work oppositely and cause new issues. That said, new Windows updates sometimes do create problems with existing functions and features, including the taskbar. Applying the previous version of Windows isn’t the hardest. If you want to try this out, here is how you do it.

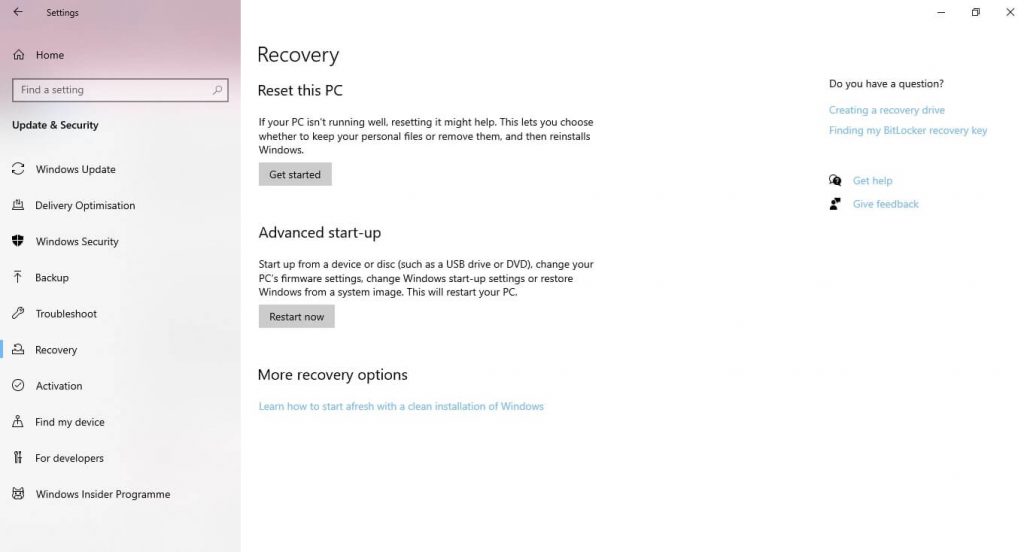
Go to Settings > Update & security > Recovery > Get started > go back to the previous version of Windows 10. From there onwards, follow the easy instructions to complete the job. Click on the taskbar and check the condition of the error. Hopefully, your issue should be resolved by now.

Windows 10 taskbar not working
Windows 10 taskbar not working fixed

Conclusion

As we stated at the very beginning, Windows 10 taskbar not working is not a colossal issue. By now, your issue should be done and dusted with it. If it still continues to bother you (which has little to no chance, actually), comment below; we will help you. Cheers!

Read More

What is the spooler subsystem app?

Best guide to know about Software reporter tool?

How to reopen a closed window?